Gradients and colors in Cocos Creator
This tutorial will demonstrate how to create grandients and change colors of Sprite and `Label objects.

Previewing
Here is a preview of what creating these effects can look like:
How do we do this?
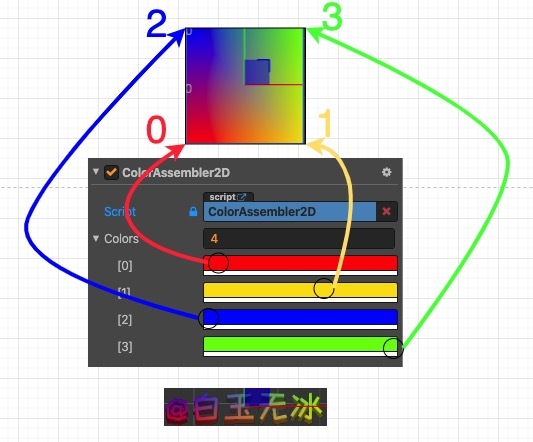
First, add the script ColorAssembler2D to a cc.Sprite or a cc.Label.
Second, adjust the color of the colors parameter. The corresponding position of each point is as follows:
Third, every cc.RenderComponent has an _assembler parameter.
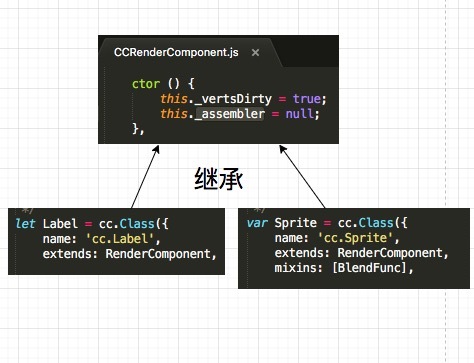
As long as this _assembler inherits cc.Assembler2D, there is a method for updateColor.
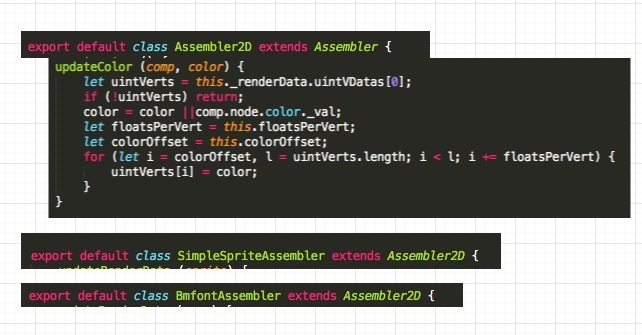
Fourth, draw the scoop according to the gourd and modify the color value of the vertex. Example code:
// private _updateColors() {

const cmp = this.getComponent(cc.RenderComponent);

if (!cmp) return;

const _assembler = cmp['_assembler'];

if (!(_assembler instanceof cc['Assembler2D'])) return;

const uintVerts = _assembler._renderData.uintVDatas[0];

if (!uintVerts) return;

const color = this.node.color;

const floatsPerVert = _assembler.floatsPerVert;

const colorOffset = _assembler.colorOffset;

let count = 0;

for (let i = colorOffset, l = uintVerts.length; i < l; i += floatsPerVert) {

uintVerts[i] = (this.colors[count++] || color)['_val'];

}
Fifth, this method needs to be modified after the engine is rendered to be effective. Example:
onEnable() {

cc.director.once(cc.Director.EVENT_AFTER_DRAW, this._updateColors, this);

}
Sixth, ff you remove this component, you must tell the engine to re-render this color. Example:
onDisable() {

cc.director.off(cc.Director.EVENT_AFTER_DRAW, this._updateColors, this);

this.node['_renderFlag'] |= cc['RenderFlow'].FLAG_COLOR;

}